How to Use the Translation Migration Tool?
The Translate & Currency app allows you to migrate translations between different stores using our Translation Migration tool. There are three migration options available:

Note
Migration is only possible for languages that are on the Advanced Translations type.
On this page:
Migration from Another Theme
- Navigate to the Migration Tool in the app's Translation section, then in the sidebar menu:

- On the Migration page, select the Migration from Another Theme option. Then, select the theme for the Migrate Translation From Theme and Migrate Translation To Theme.

- Once you selected your desired theme for migration, you can begin the process by clicking Start Translation Migration.

- Then the Migration task will begin, and you’ll be redirected to the View Task page. Once the task is finished, click the Details button to review the migration results.

Migration from Another Store
To migrate translations from one store to another, you'll need to export the translation file from the original store and upload it to the destination store. For a detailed guide on exporting translations, please refer to this guide.
Note
It is only possible to migrate from one store to another if both stores have the same default language.
- Obtain the exported file from the original store. Then, in the destination store, navigate to the Migration Tool in the app's Translation section, then in the sidebar menu:
- Select the Migration from another store tab and upload the exported file.

- After uploading, the app will preview the file. Scroll to the bottom of the page and click Start Translation Migration to proceed.

- The migration task will start, and when it is finished, the translations data will be ready to use on the destination store.

Migration from Another App
To migrate translations from another app to our platform, you will need to export the translation file from the other app. Currently, we support migrations from the following apps:
- Weglot
-
Langify
Each of these apps requires a slightly different process. To get started, please follow the steps below:
- Navigate to the Migration Tool in the app's Translation section, then in the sidebar menu:
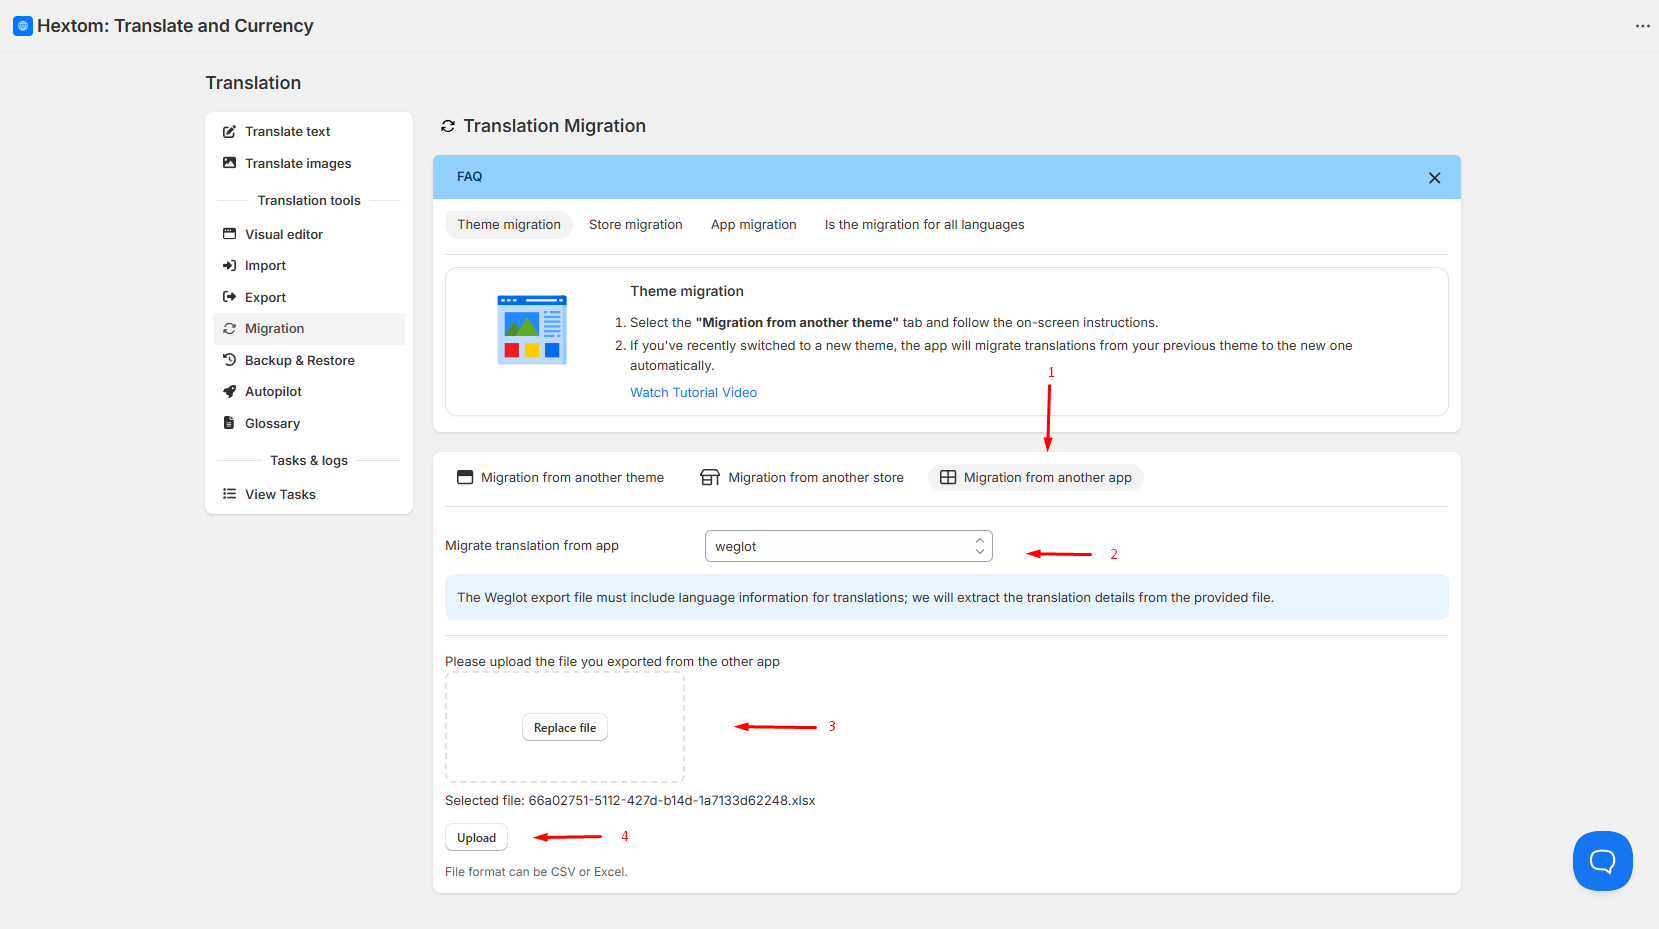
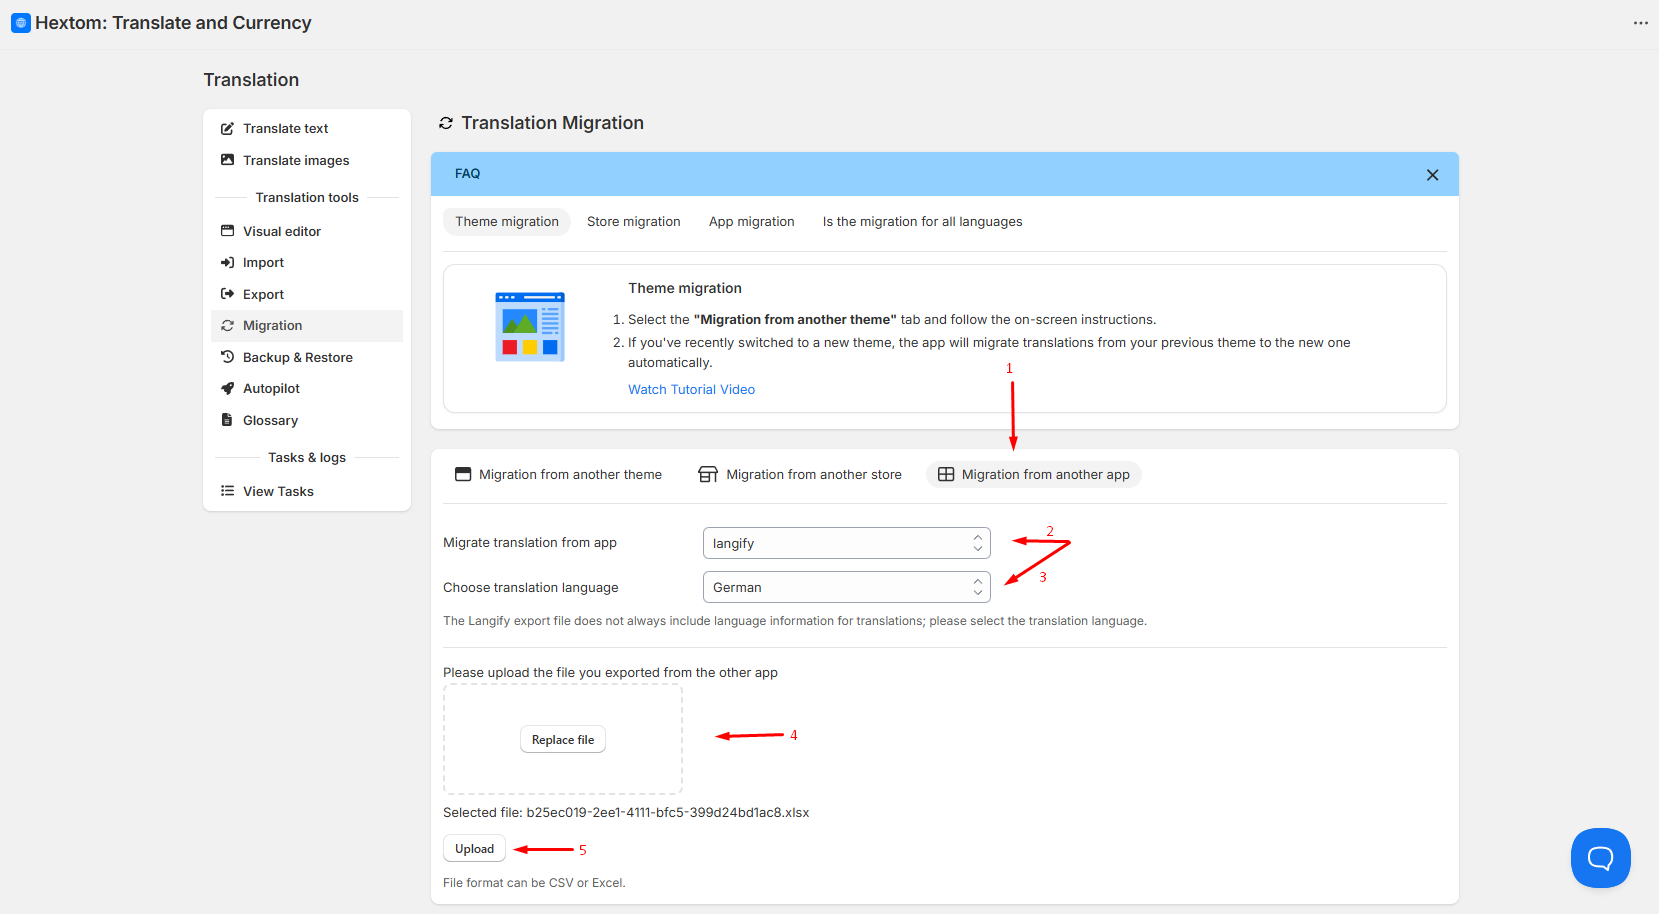
- Select the Migration from another app tab, choose the source app, and then upload the exported file.
-
Weglot: The export file must contain language information for the translations. We will automatically extract the translation details from this file.
-
Langify: The export file may not always include language information. In this case, you will need to manually select the translation language during the upload process.


- After uploading, the app will preview the file. Scroll to the bottom of the page and click Start Translation Migration to proceed.
- Then the Migration task will begin, and you’ll be redirected to the View Task page. Once the task is finished, click the Details button to review the migration results.
Please let us know at help@hextom.com if you have any questions or concerns!